









| Chapters | Mandarin Mayhem and Tequila Slammer |
|---|---|
| Total | 24 Kill Frenzies (12 per chapter) |
| Starts with | Weapon crates and parked vehicles |
| Targets | $5,000 to $15,000 of damage |
| Time limit | 2 minutes |
| Reward | Crate stash in Central Market after each chapter |
San Andreas has 24 Kill Frenzies, twelve in Mandarin Mayhem and twelve in Tequila Slammer. Each gives you two minutes to cause $5,000, $10,000 or $15,000 of damage with a weapon or a vehicle. Finishing all twelve of a chapter unlocks a reward in Central Market.
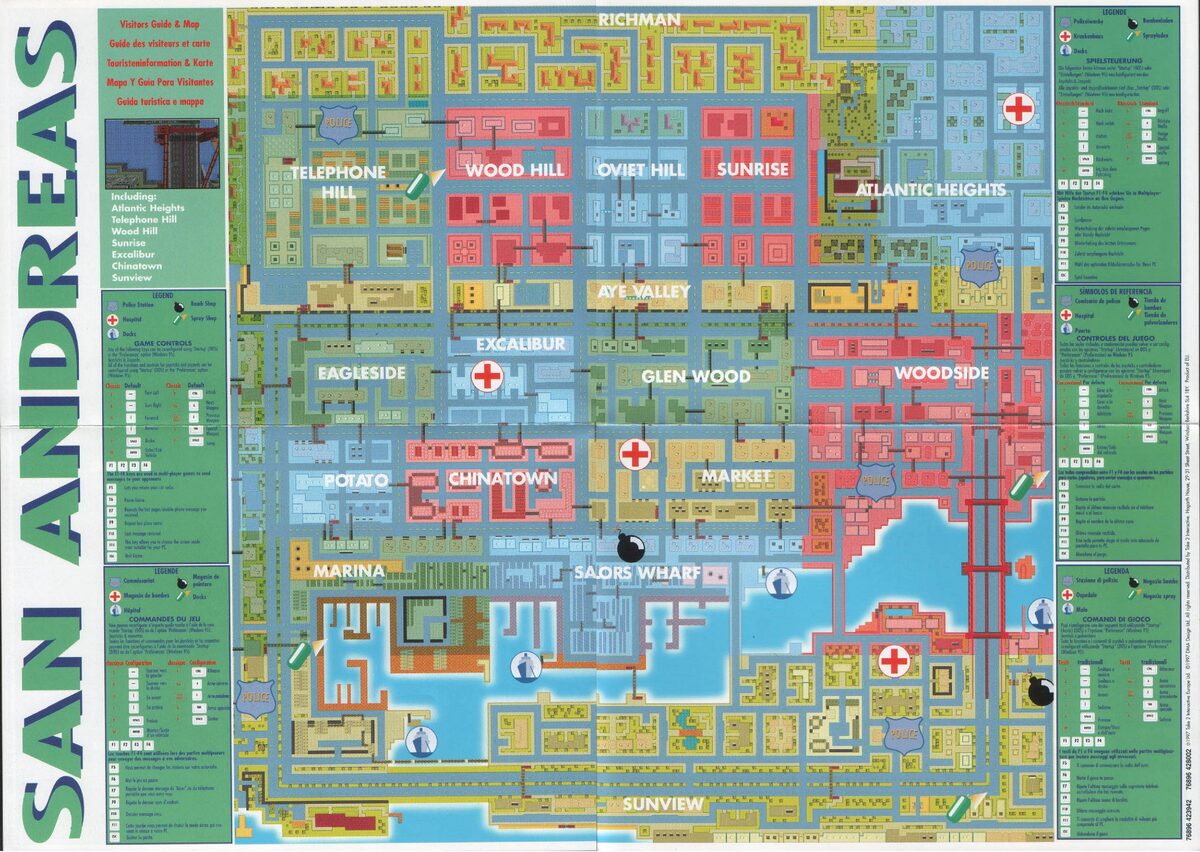
How Kill Frenzies work

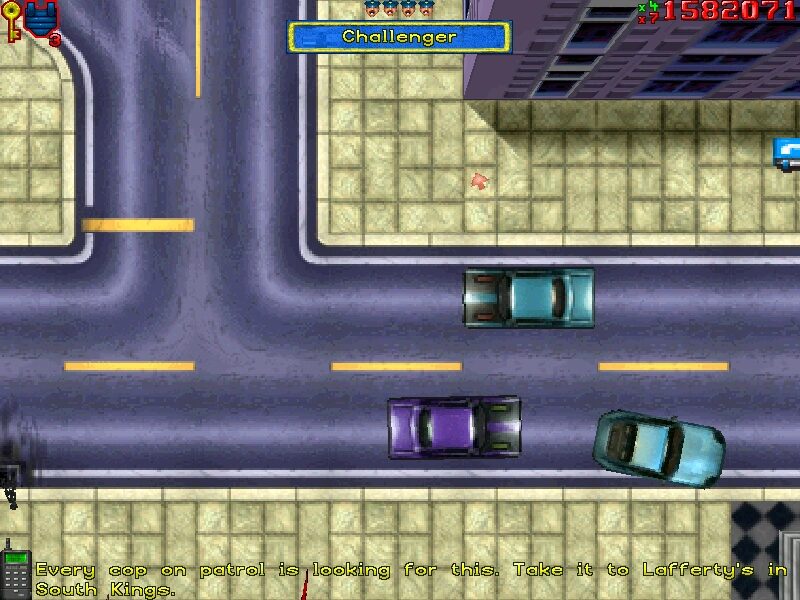
Some frenzies are weapon crates (Machine Gun, Rocket Launcher or Flamethrower) and some are parked vehicles (Tank, Bus, Love Wagon, Monster Bug or Transit Van). Break the crate or take the vehicle and the message area shows a Kill Frenzy icon with the target and a countdown timer at the top left.
You do not have to use the frenzy weapon or kill anyone: any points you earn count towards the target, so picking up a person or delivering a car works as well. The least risky way is to start a frenzy just before a job that pays a lot, so the job’s score finishes it. A finished frenzy clears your wanted level. Each one you complete is added to the “secrets found” figure on the chapter’s stats screen, which is how the game counts a chapter at 100%. See the 100% checklist and points and multipliers for how that fits with the rest of a chapter.
Quick reference
Mandarin Mayhem
| # | Area | Weapon or vehicle | Target | Time |
|---|---|---|---|---|
| 1 | Southwest Aye Valley | Love Wagon | $5,000 damage | 2 minutes |
| 2 | East Wood Hill | Love Wagon | $10,000 damage | 2 minutes |
| 3 | Central Richman | Monster Bug | $15,000 damage | 2 minutes |
| 4 | Northeast Sunrise | 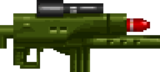 Rocket Launcher | $15,000 damage | 2 minutes |
| 5 | South Sunrise | 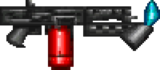 Flamethrower | $15,000 damage | 2 minutes |
| 6 | North Atlantic Heights | Rocket Launcher | $10,000 damage | 2 minutes |
| 7 | Southeast Woodside | Tank | $5,000 damage | 2 minutes |
| 8 | South Sunview | Rocket Launcher | $5,000 damage | 2 minutes |
| 9 | Northwest Sunview | Flamethrower | $10,000 damage | 2 minutes |
| 10 | Northwest Sailor’s Wharf | Tank | $10,000 damage | 2 minutes |
| 11 | Southeast Chinatown | Bus | $10,000 damage | 2 minutes |
| 12 | Northeast Market | Flamethrower | $5,000 damage | 2 minutes |
Tequila Slammer
| # | Area | Weapon or vehicle | Target | Time |
|---|---|---|---|---|
| 1 | West Woodside | Love Wagon | $5,000 damage | 2 minutes |
| 2 | East Chinatown | Flamethrower | $10,000 damage | 2 minutes |
| 3 | Southeast Marina | Tank | $5,000 damage | 2 minutes |
| 4 | East Sailor’s Wharf | Flamethrower | $5,000 damage | 2 minutes |
| 5 | Southeast Sunview | Love Wagon | $10,000 damage | 2 minutes |
| 6 | Southeast Woodside | Rocket Launcher | $10,000 damage | 2 minutes |
| 7 | East Woodside | Bus | $10,000 damage | 2 minutes |
| 8 | Northeast Woodside | Rocket Launcher | $5,000 damage | 2 minutes |
| 9 | East Atlantic Heights | Monster Bug | $15,000 damage | 2 minutes |
| 10 | Southeast Richman | Tank | $10,000 damage | 2 minutes |
| 11 | North Soviet Hill | Flamethrower | $15,000 damage | 2 minutes |
| 12 | Northwest Eagleside | Rocket Launcher | $15,000 damage | 2 minutes |
Reward for finishing every frenzy
Mandarin Mayhem
Finish every frenzy in Mandarin Mayhem and the game tells you to collect a reward. In Central Market, at the top of a building south of the Central Market phones. The prize sits inside crates arranged to spell out letters spelling the letters DMA. It holds ten extra lives, nine score multipliers, a Machine Gun, a Rocket Launcher, a Flamethrower, Armor, a Speed Up and a Police Bribe.
Tequila Slammer
Finish every frenzy in Tequila Slammer and the game tells you to collect a reward. In Central Market, at the top of a building south of the Central Market phones. The prize sits inside crates arranged to spell out letters spelling the letters DMA. It holds ten extra lives, nine score multipliers, a Machine Gun, a Rocket Launcher, a Flamethrower, Armor, a Speed Up and a Police Bribe.
Tips for damage frenzies
The target is damage, not points. Wrecking cars is the quickest way to build it up, so drive or walk into the busiest part of the district and keep moving. With the Tank or the Bus, hit everything in front of you rather than steering around it.
Mandarin Mayhem Kill Frenzies
Target score for the chapter: 2,000,000. Each entry below gives the area, what starts it and the target.
Kill Frenzy 1: Southwest Aye Valley
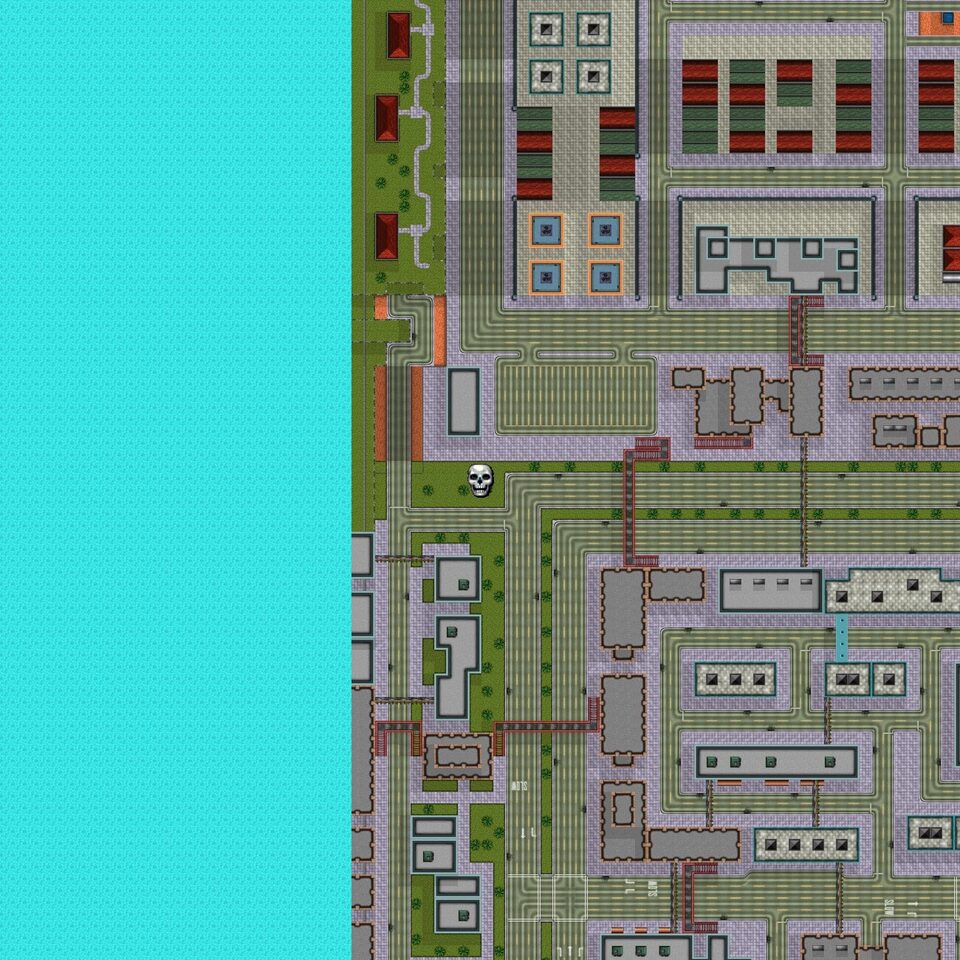
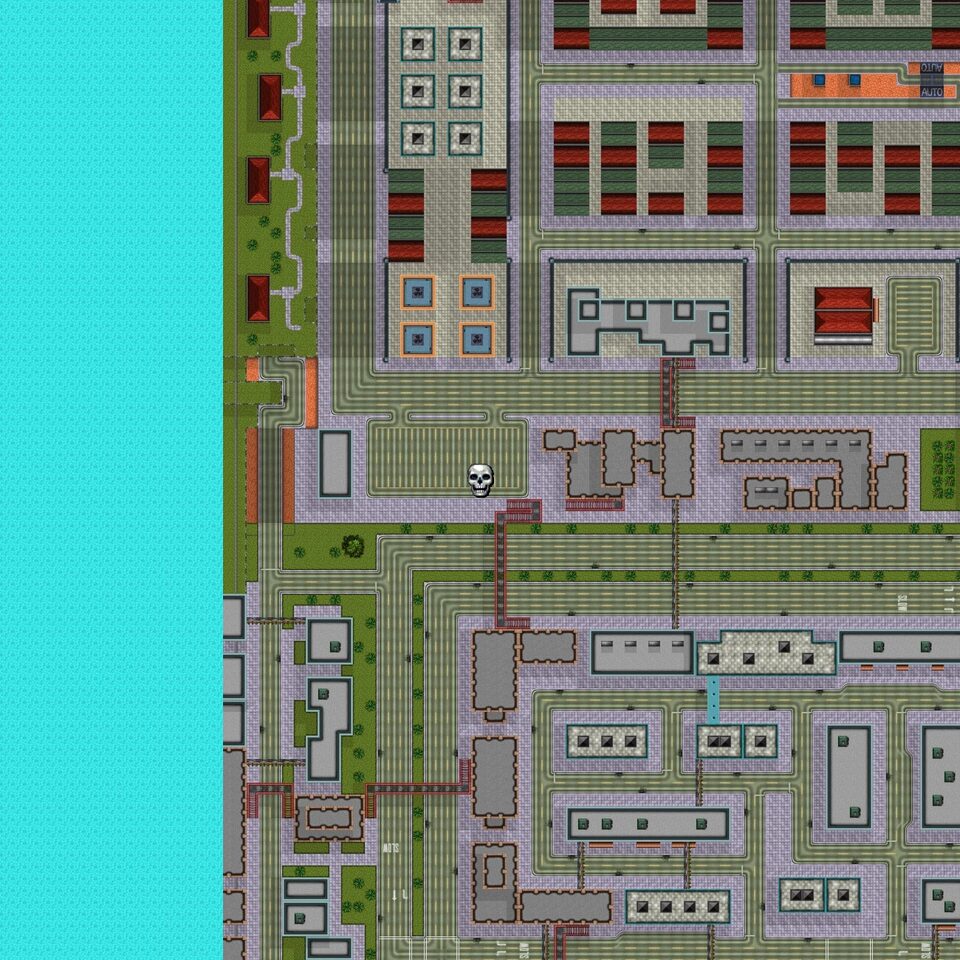
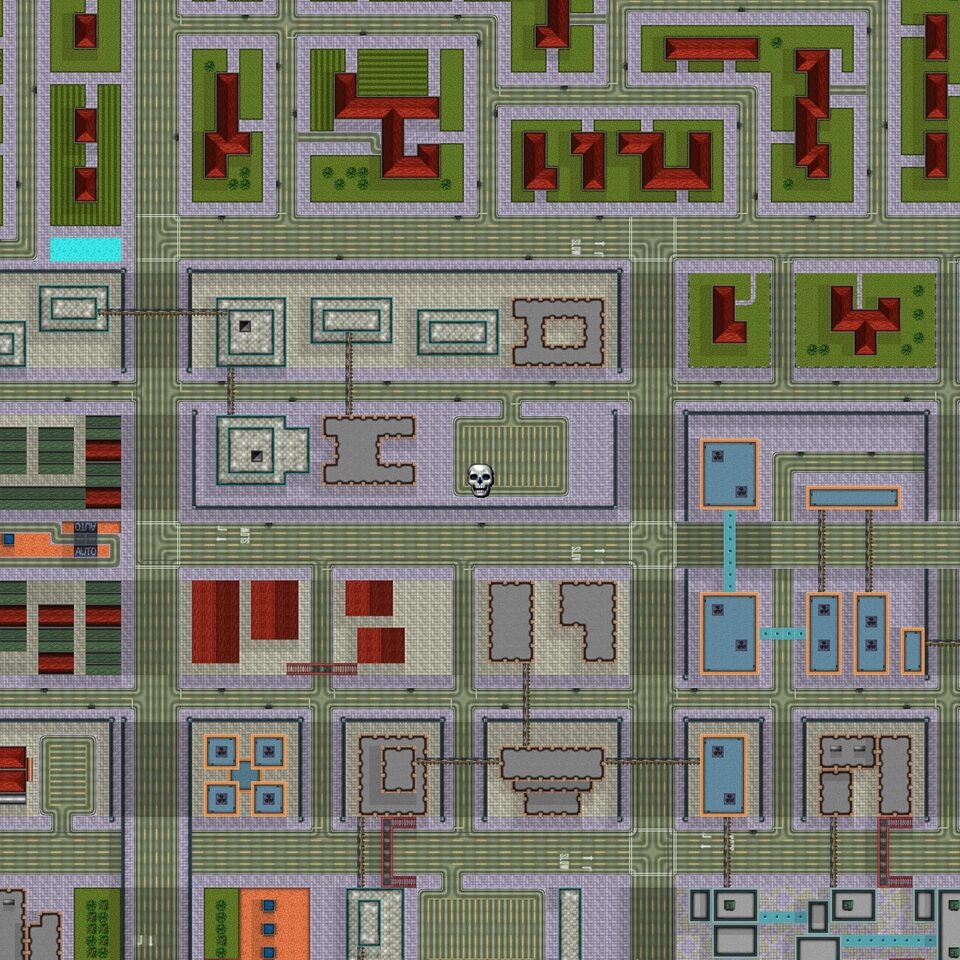
In Southwest Aye Valley, the frenzy spot is on the west side of the district, a few blocks from the sea. Take the parked Love Wagon to start it, then score $5,000 of damage within 2 minutes. Take the Love Wagon onto the nearest main road and ram everything.
Kill Frenzy 2: East Wood Hill
In East Wood Hill, the frenzy spot is in the middle of a block of houses with red roofs. Take the parked Love Wagon to start it, then score $10,000 of damage within 2 minutes. Plow through parked and moving cars; the heavy body carries the damage.
Kill Frenzy 3: Central Richman
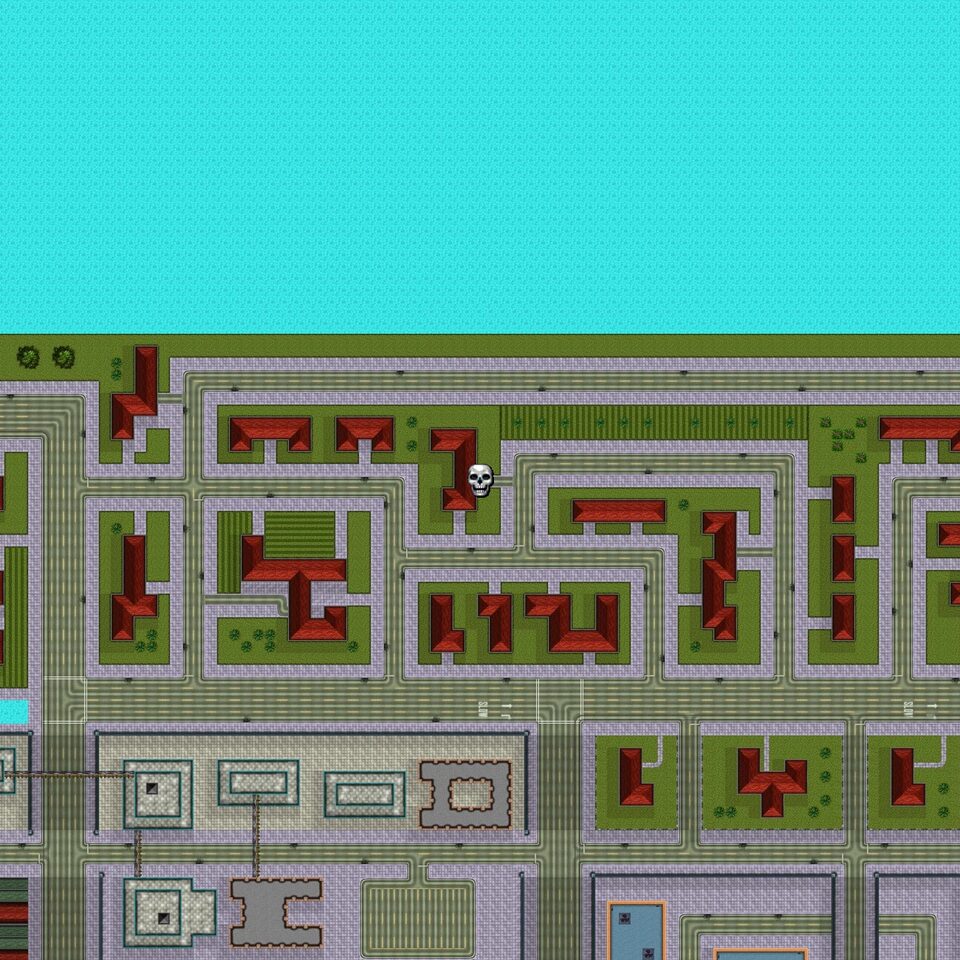
In Central Richman, the frenzy spot is on the north edge of the district, with open water just above. Take the parked Monster Bug to start it, then score $15,000 of damage within 2 minutes. Drive over traffic and street furniture; the big wheels shrug off collisions.
Kill Frenzy 4: Northeast Sunrise
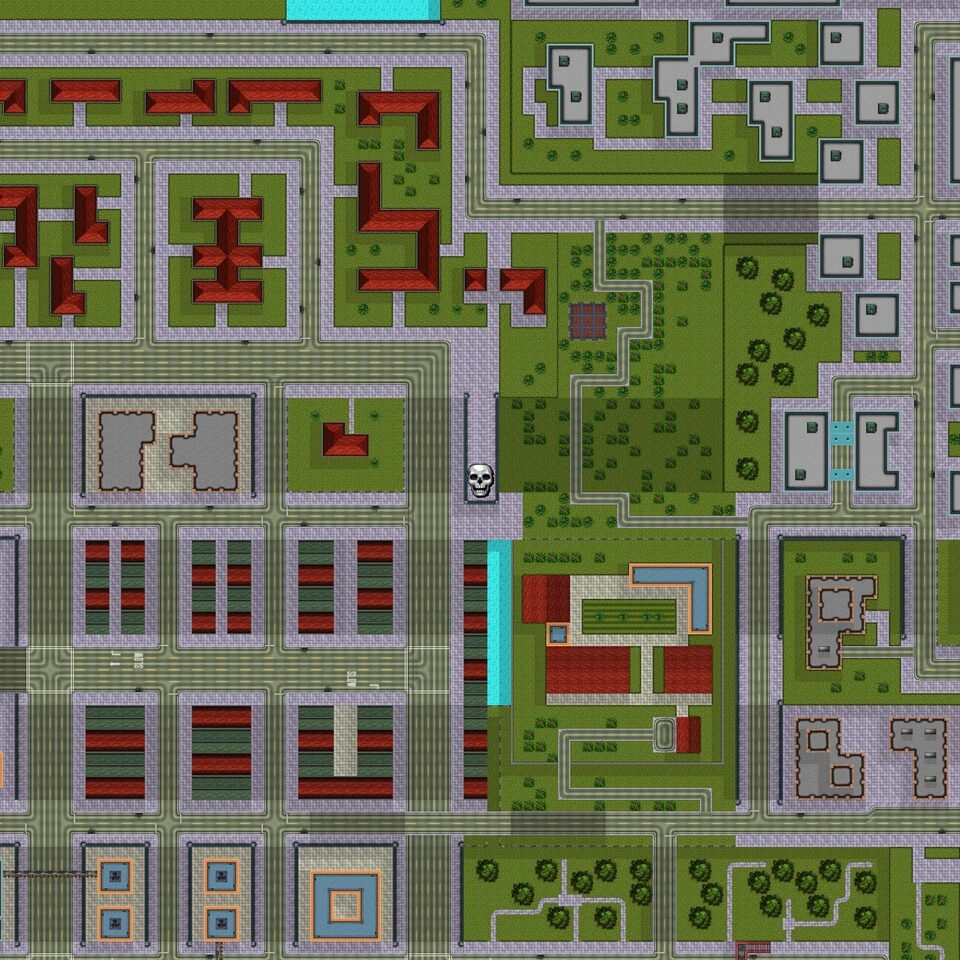
In Northeast Sunrise, the frenzy spot is next to a wooded area on its west side. Break the Rocket Launcher crate to start it, then score $15,000 of damage within 2 minutes. Keep your distance from the blast and aim at groups of cars at junctions.
Kill Frenzy 5: South Sunrise
In South Sunrise, the frenzy spot is on a street corner on one of the main roads. Break the Flamethrower crate to start it, then score $15,000 of damage within 2 minutes. The range is short, so walk straight into crowds and cars to run up the total.
Kill Frenzy 6: North Atlantic Heights
In North Atlantic Heights, the frenzy spot is at the north end of the district, beside a block of warehouses. Break the Rocket Launcher crate to start it, then score $10,000 of damage within 2 minutes. Keep your distance from the blast and aim at groups of cars at junctions.
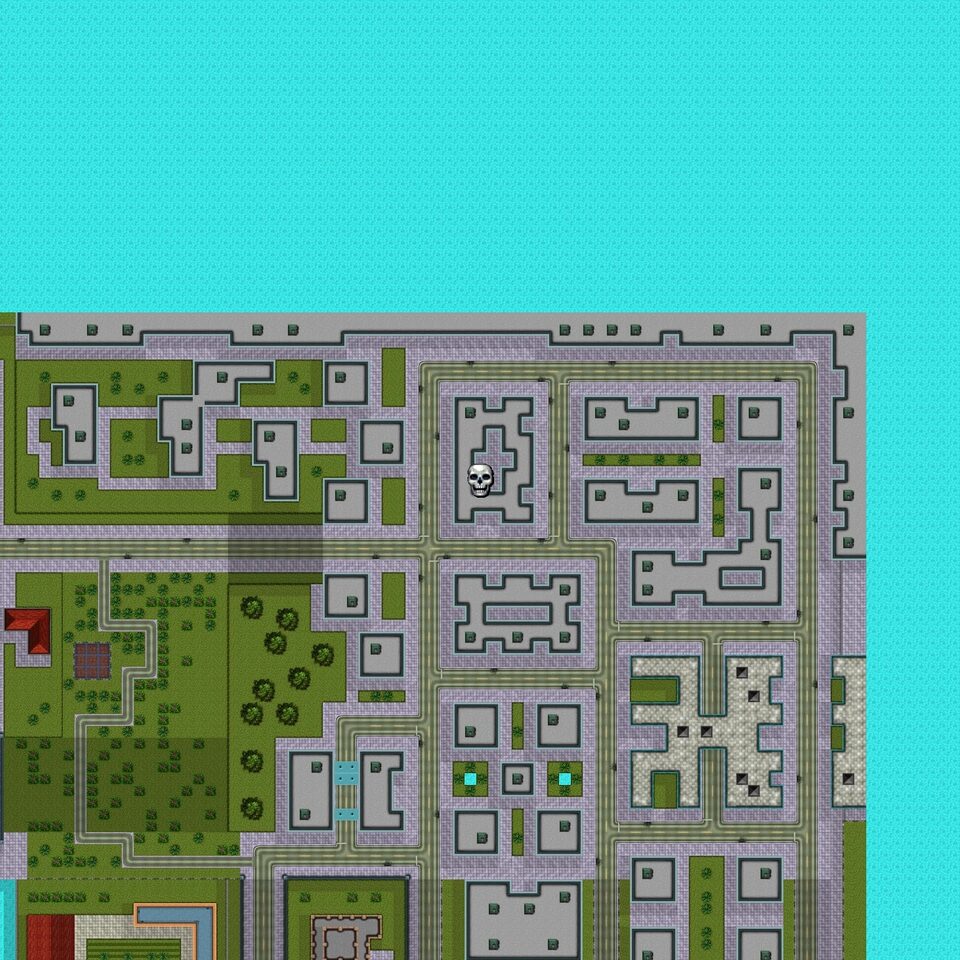
Kill Frenzy 7: Southeast Woodside
In Southeast Woodside, the frenzy spot is at the foot of a red road bridge, next to the water. Take the parked Tank to start it, then score $5,000 of damage within 2 minutes. Drive onto a busy street and run over and shoot everything in reach.
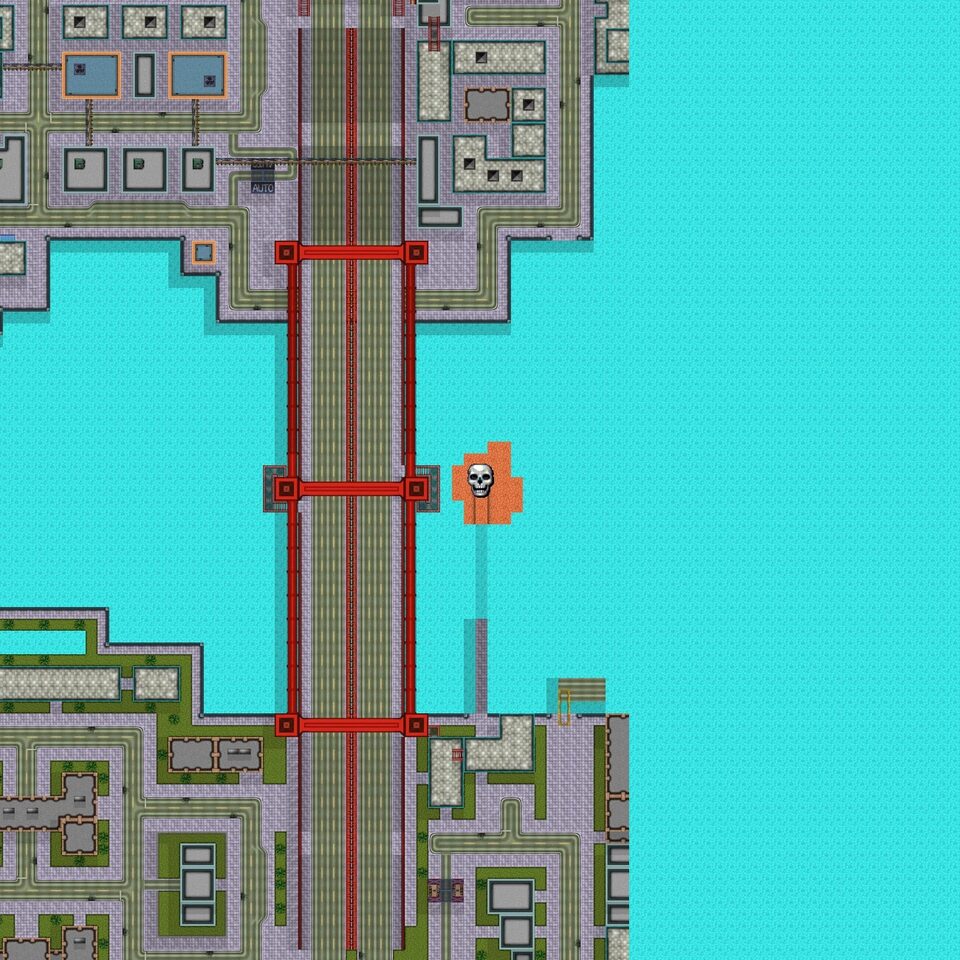
Kill Frenzy 8: South Sunview
In South Sunview, the frenzy spot is on the shoreline road on the south side of the map. Break the Rocket Launcher crate to start it, then score $5,000 of damage within 2 minutes. Keep your distance from the blast and aim at groups of cars at junctions.
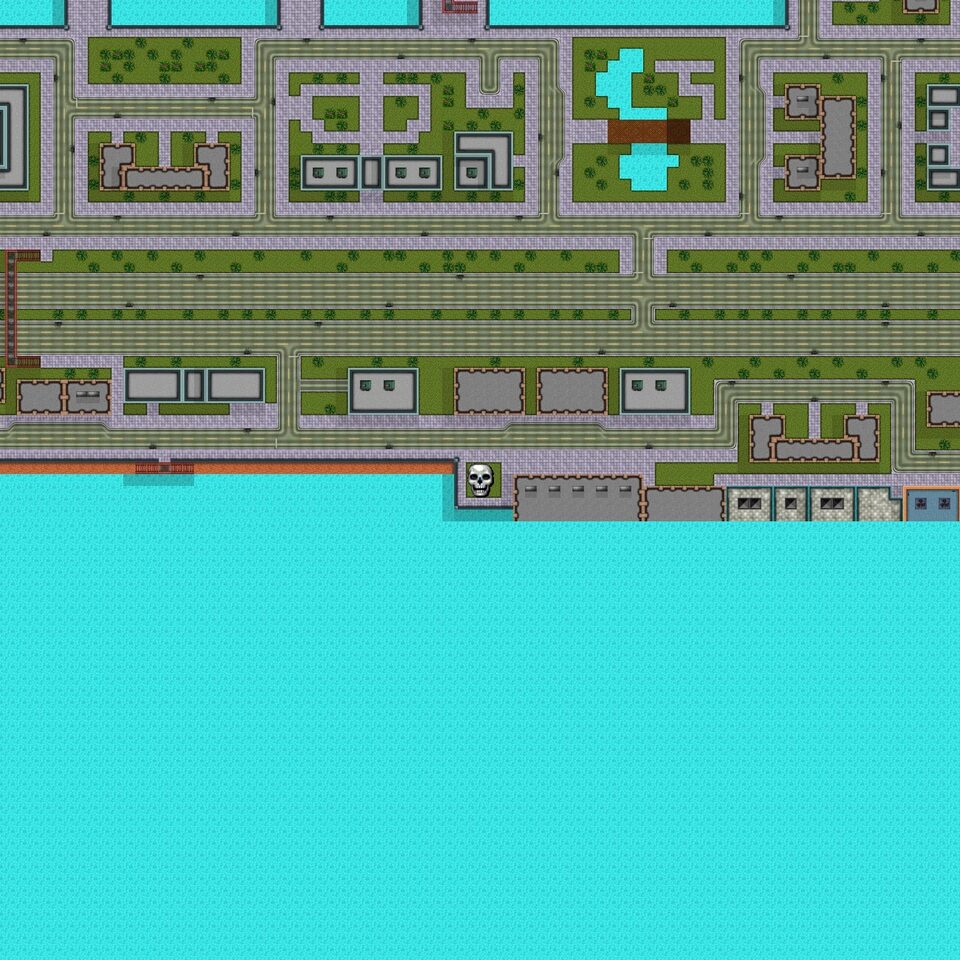
Kill Frenzy 9: Northwest Sunview
In Northwest Sunview, the frenzy spot is inside the harbor basin among the docks. Break the Flamethrower crate to start it, then score $10,000 of damage within 2 minutes. The range is short, so walk straight into crowds and cars to run up the total.
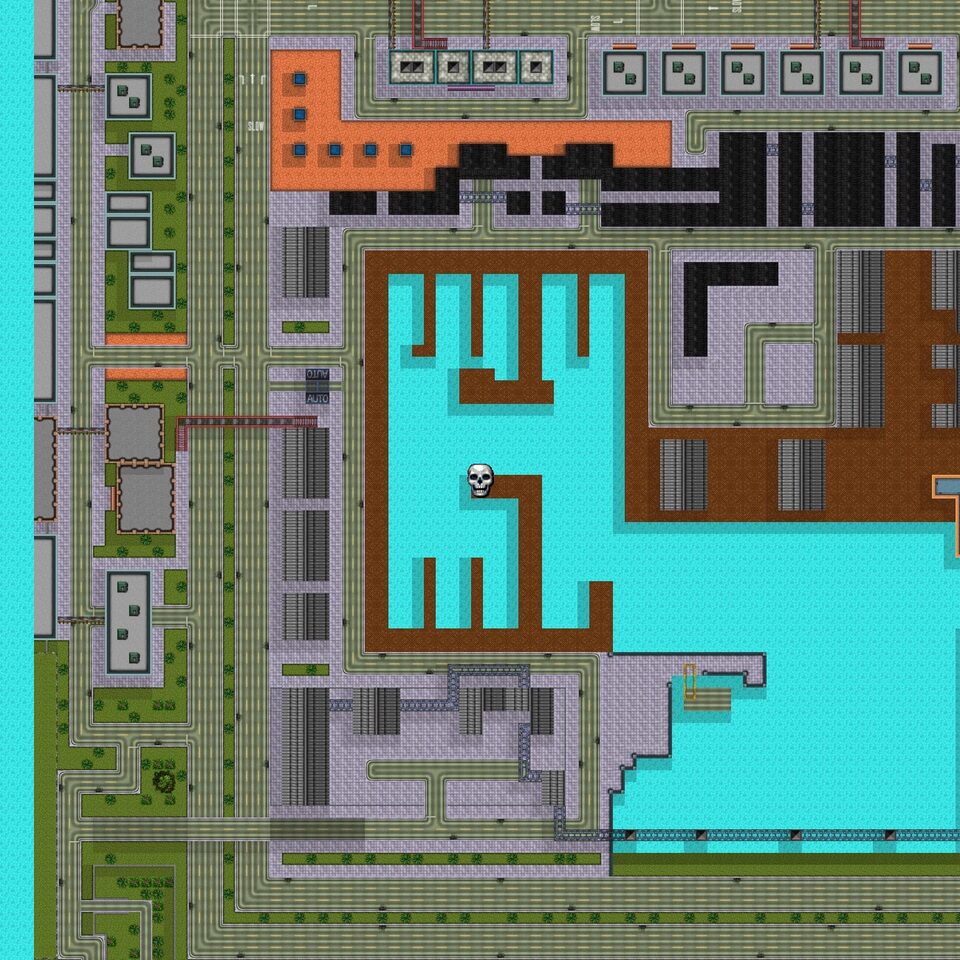
Kill Frenzy 10: Northwest Sailor’s Wharf
In Northwest Sailor’s Wharf, the frenzy spot is along the dock warehouses of the wharf. Take the parked Tank to start it, then score $10,000 of damage within 2 minutes. Use the cannon on cars at junctions and crush what you cannot shoot.
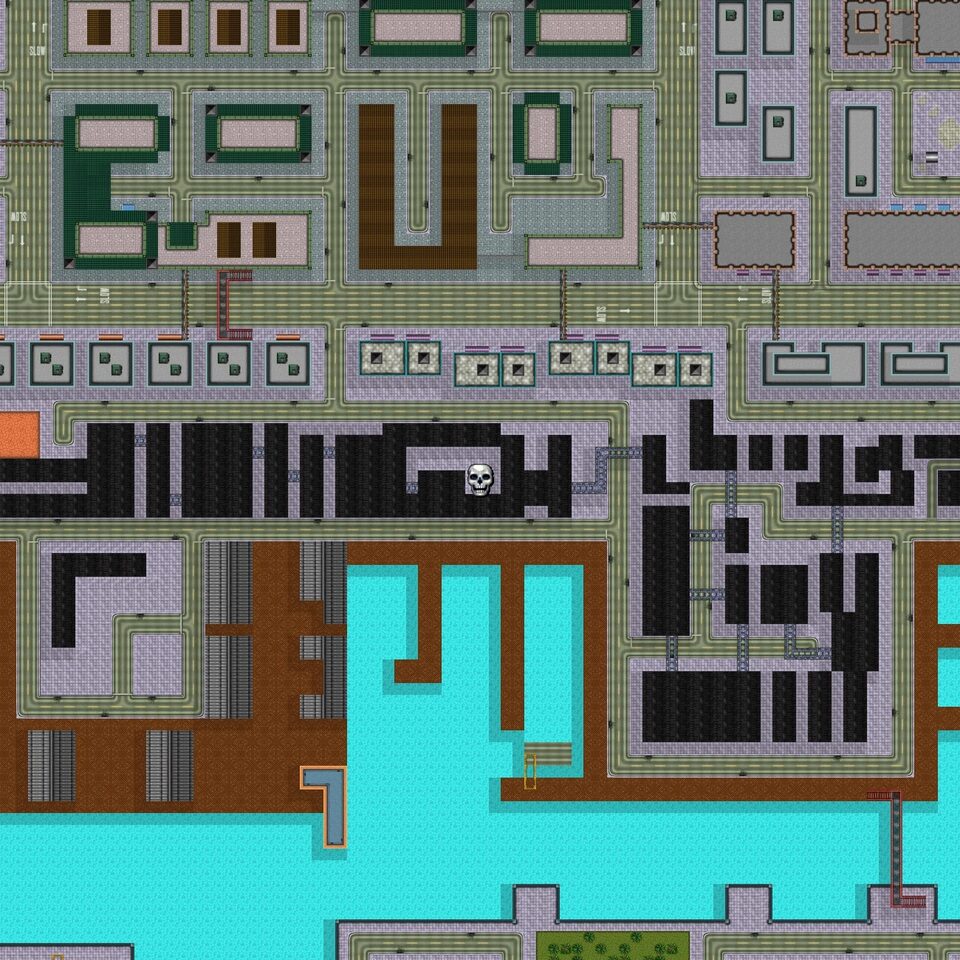
Kill Frenzy 11: Southeast Chinatown
In Southeast Chinatown, the frenzy spot is beside the dock warehouses and a block of green-roofed buildings. Take the parked Bus to start it, then score $10,000 of damage within 2 minutes. The bus is heavy, so keep driving into cars rather than around them.
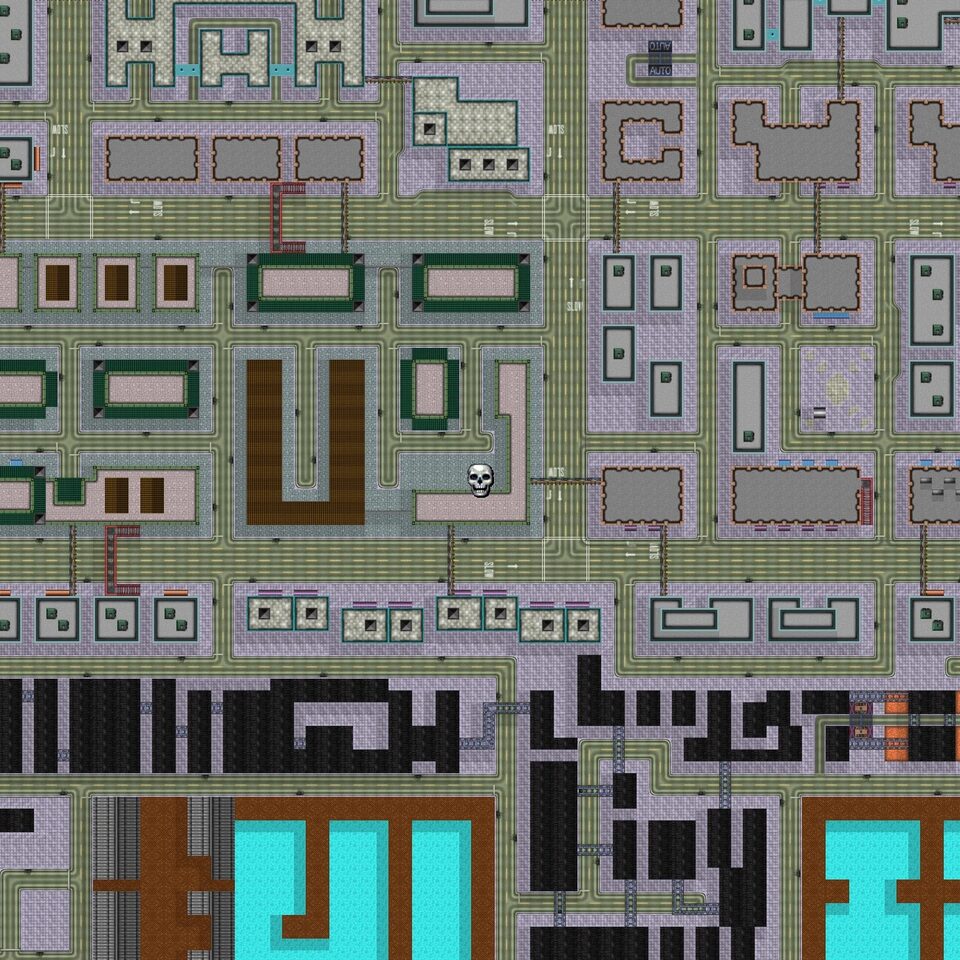
Kill Frenzy 12: Northeast Market
In Northeast Market, the frenzy spot is on a street corner on one of the main roads. Break the Flamethrower crate to start it, then score $5,000 of damage within 2 minutes. Keep moving through traffic; burning vehicles add damage quickly.
Tequila Slammer Kill Frenzies
Target score for the chapter: 3,000,000. Each entry below gives the area, what starts it and the target.
Kill Frenzy 1: West Woodside
In West Woodside, the frenzy spot is in a block of low buildings, not far from the shore. Take the parked Love Wagon to start it, then score $5,000 of damage within 2 minutes. Take the Love Wagon onto the nearest main road and ram everything.
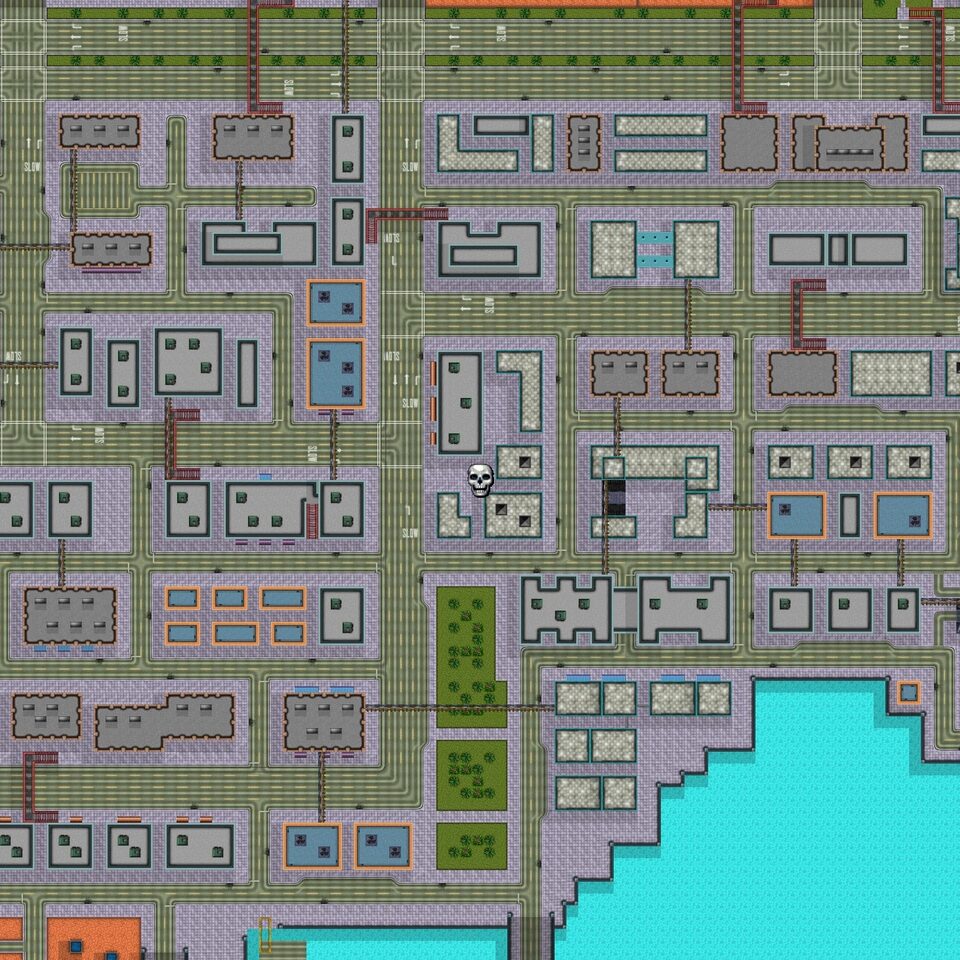
Kill Frenzy 2: East Chinatown
In East Chinatown, the frenzy spot is just north of a row of dock warehouses, next to green-roofed buildings. Break the Flamethrower crate to start it, then score $10,000 of damage within 2 minutes. Keep moving through traffic; burning vehicles add damage quickly.
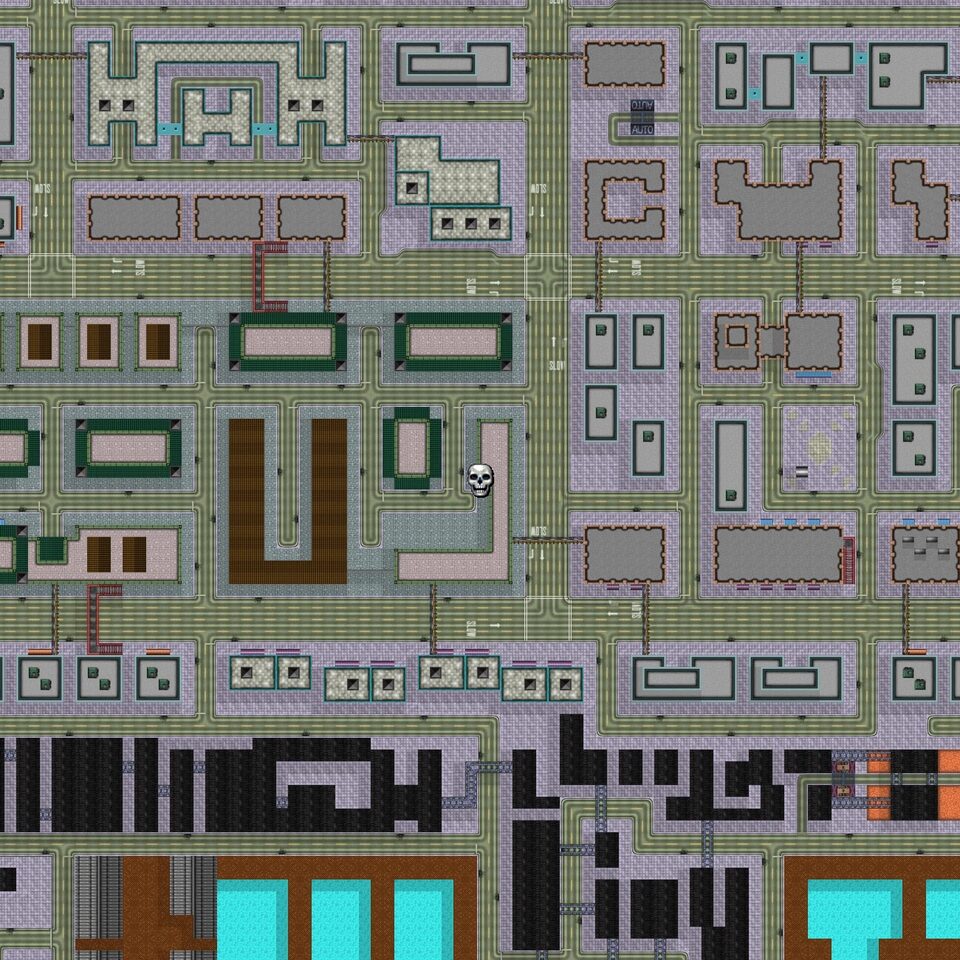
Kill Frenzy 3: Southeast Marina
In Southeast Marina, the frenzy spot is inside a dock basin, on the quay. Take the parked Tank to start it, then score $5,000 of damage within 2 minutes. Drive onto a busy street and run over and shoot everything in reach.
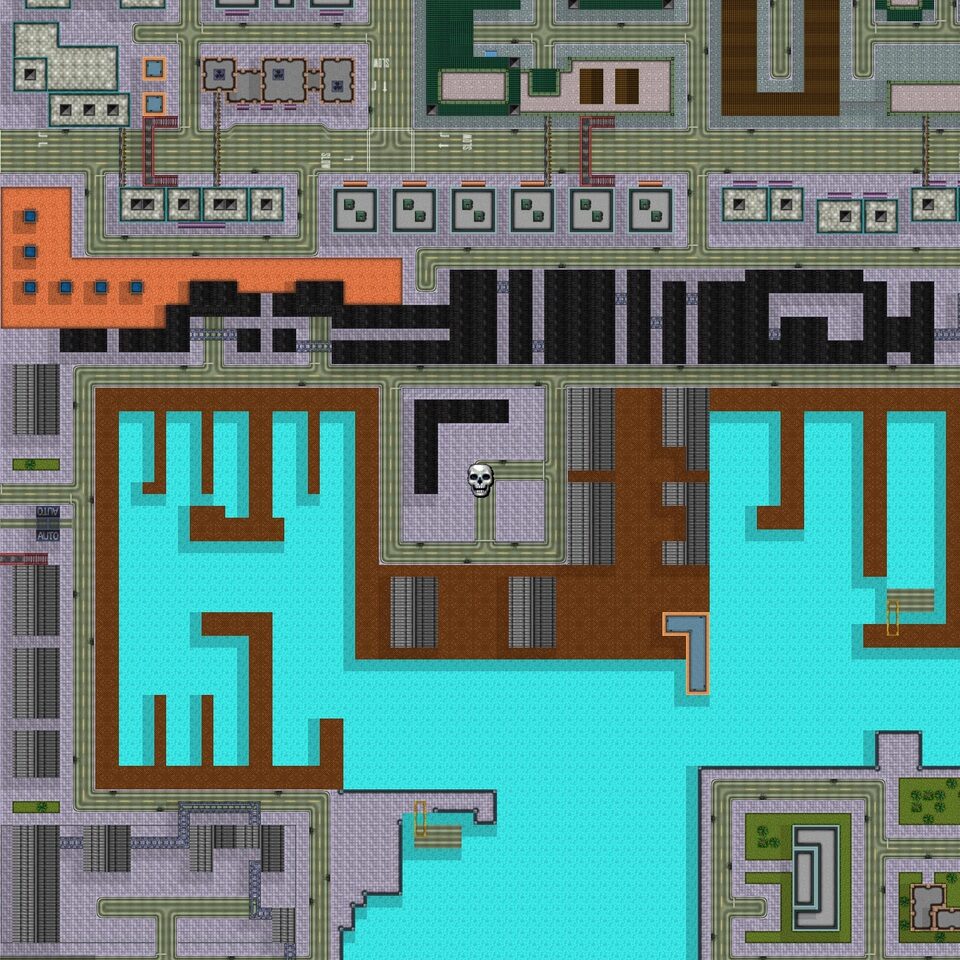
Kill Frenzy 4: East Sailor’s Wharf
In East Sailor’s Wharf, the frenzy spot is at the edge of a harbor basin, on its west side. Break the Flamethrower crate to start it, then score $5,000 of damage within 2 minutes. Keep moving through traffic; burning vehicles add damage quickly.
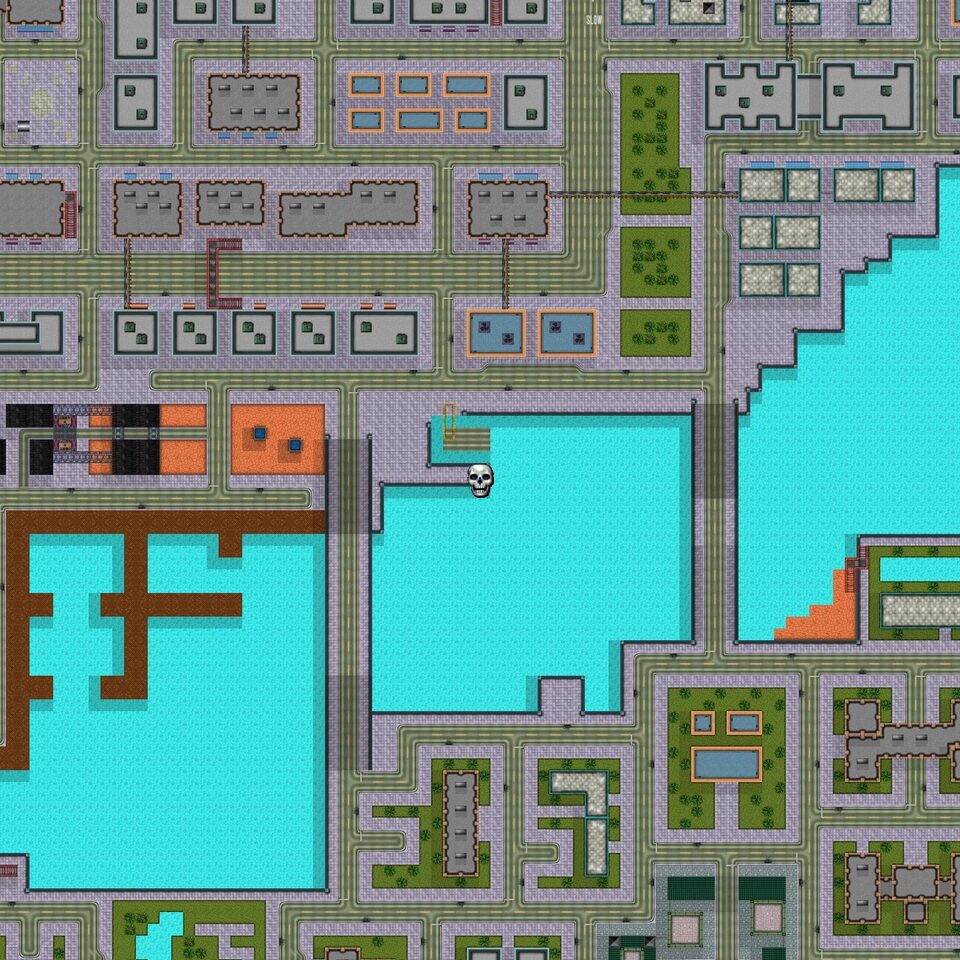
Kill Frenzy 5: Southeast Sunview
In Southeast Sunview, the frenzy spot is on a street just north of the shoreline, south of a lake. Take the parked Love Wagon to start it, then score $10,000 of damage within 2 minutes. Take the Love Wagon onto the nearest main road and ram everything.
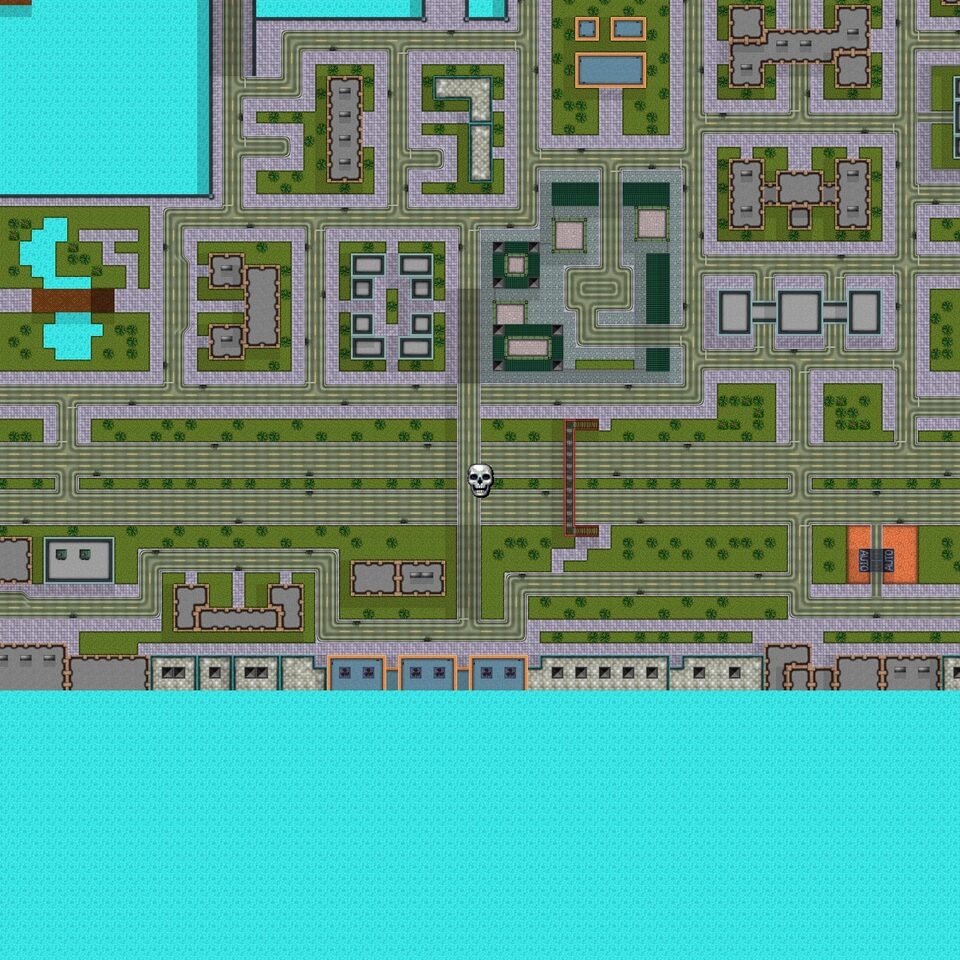
Kill Frenzy 6: Southeast Woodside
In Southeast Woodside, the frenzy spot is beside a red road bridge, on the east shore. Break the Rocket Launcher crate to start it, then score $10,000 of damage within 2 minutes. Keep your distance from the blast and aim at groups of cars at junctions.
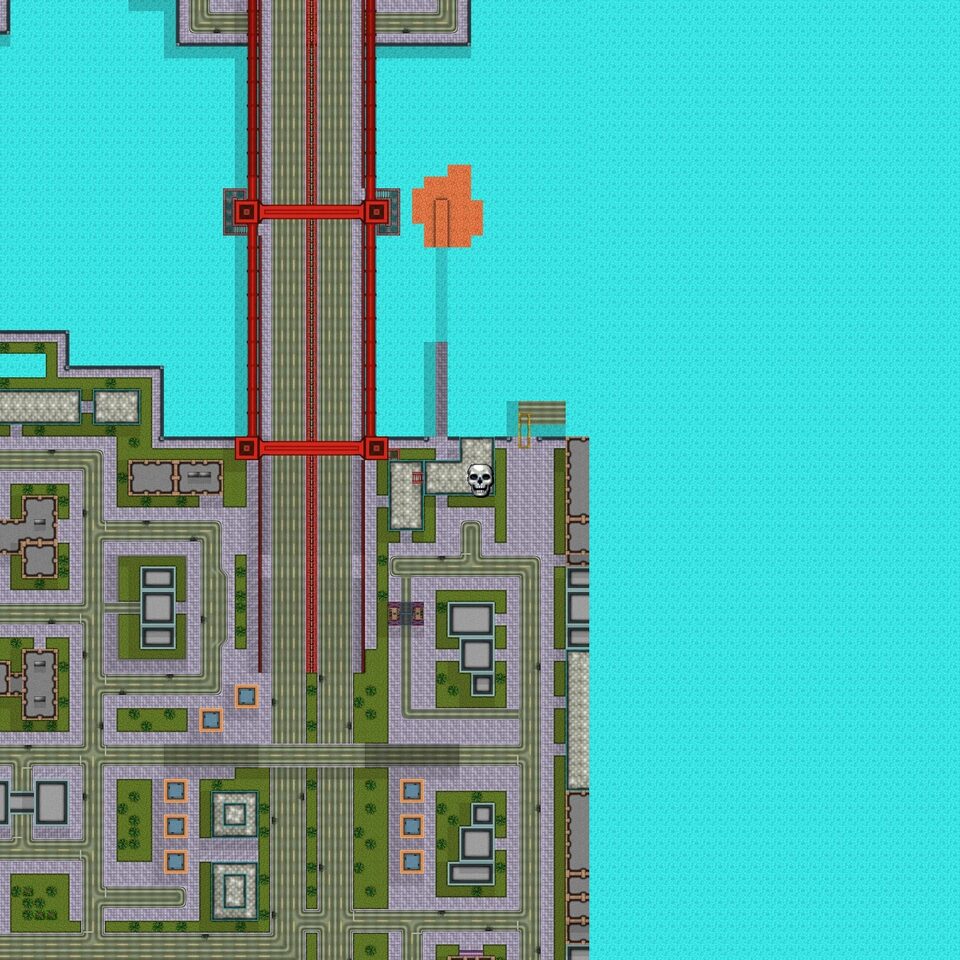
Kill Frenzy 7: East Woodside
In East Woodside, the frenzy spot is at the approach to a red road bridge, close to the water. Take the parked Bus to start it, then score $10,000 of damage within 2 minutes. The bus is heavy, so keep driving into cars rather than around them.
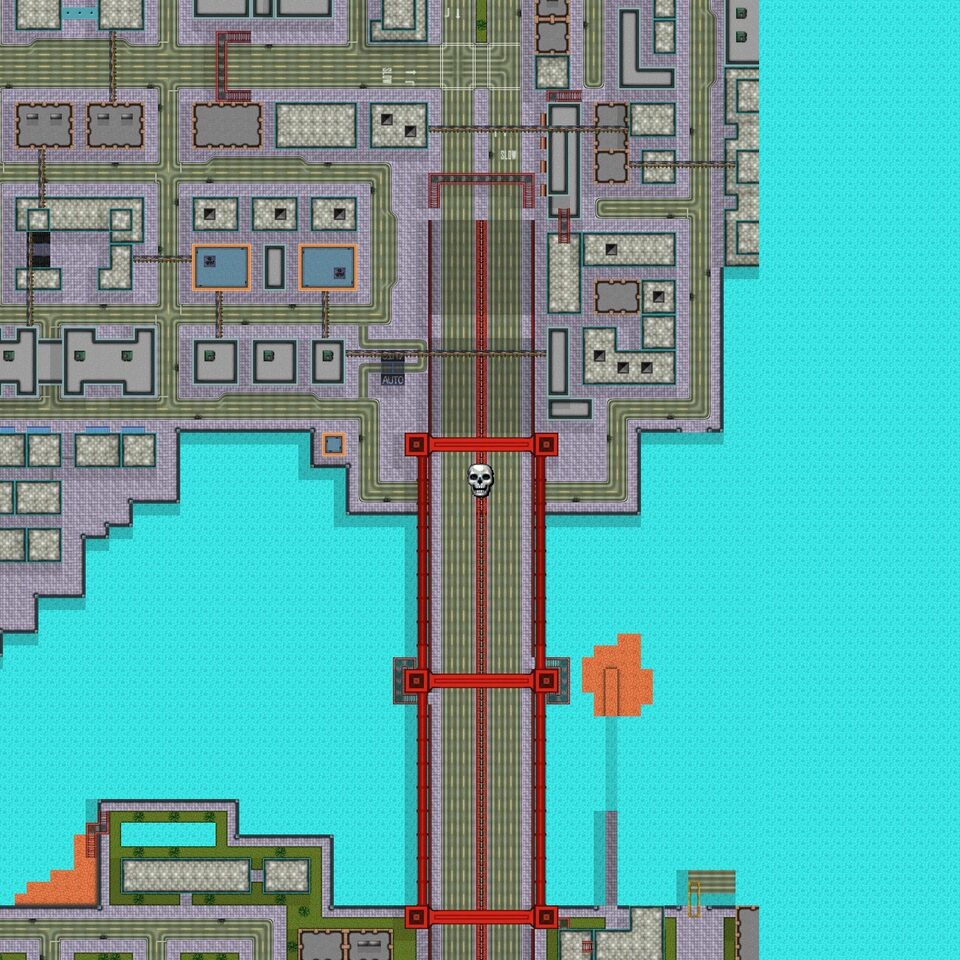
Kill Frenzy 8: Northeast Woodside
In Northeast Woodside, the frenzy spot is at the next bridge to the north, on the east shore. Break the Rocket Launcher crate to start it, then score $5,000 of damage within 2 minutes. Keep your distance from the blast and aim at groups of cars at junctions.
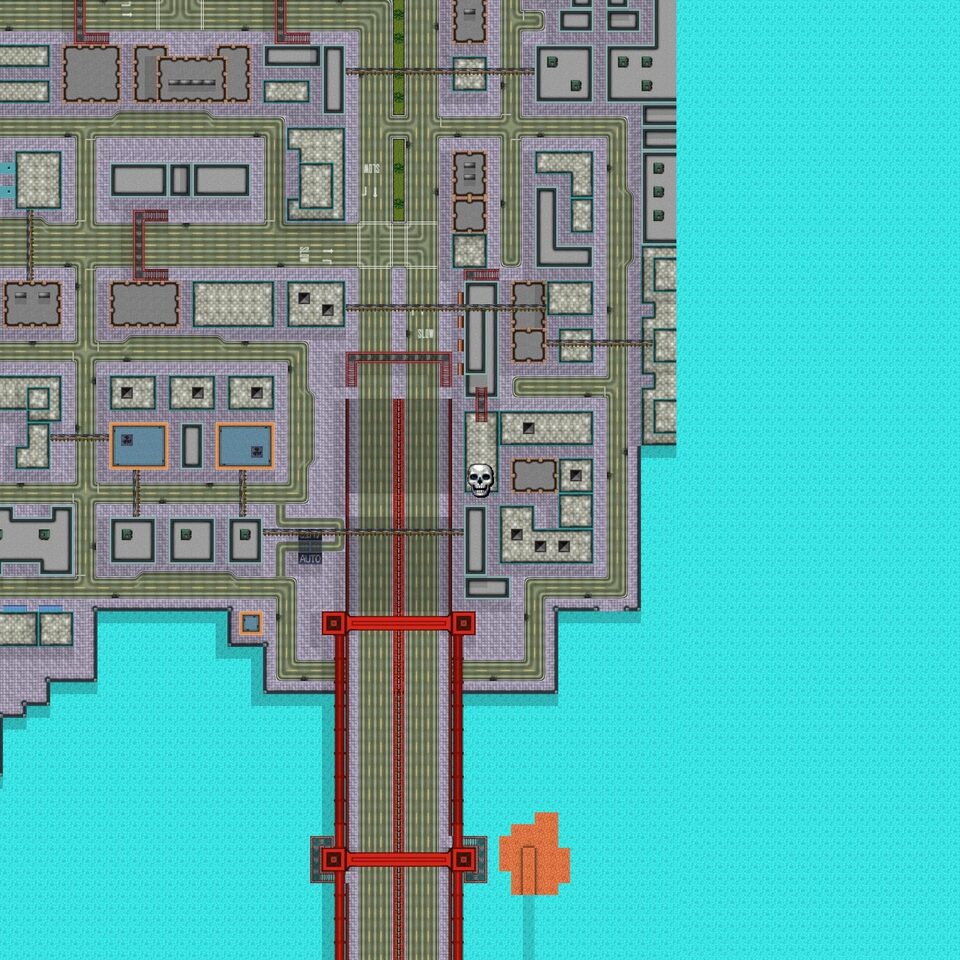
Kill Frenzy 9: East Atlantic Heights
In East Atlantic Heights, the frenzy spot is on the east coast, by the edge of the water. Take the parked Monster Bug to start it, then score $15,000 of damage within 2 minutes. Drive over traffic and street furniture; the big wheels shrug off collisions.
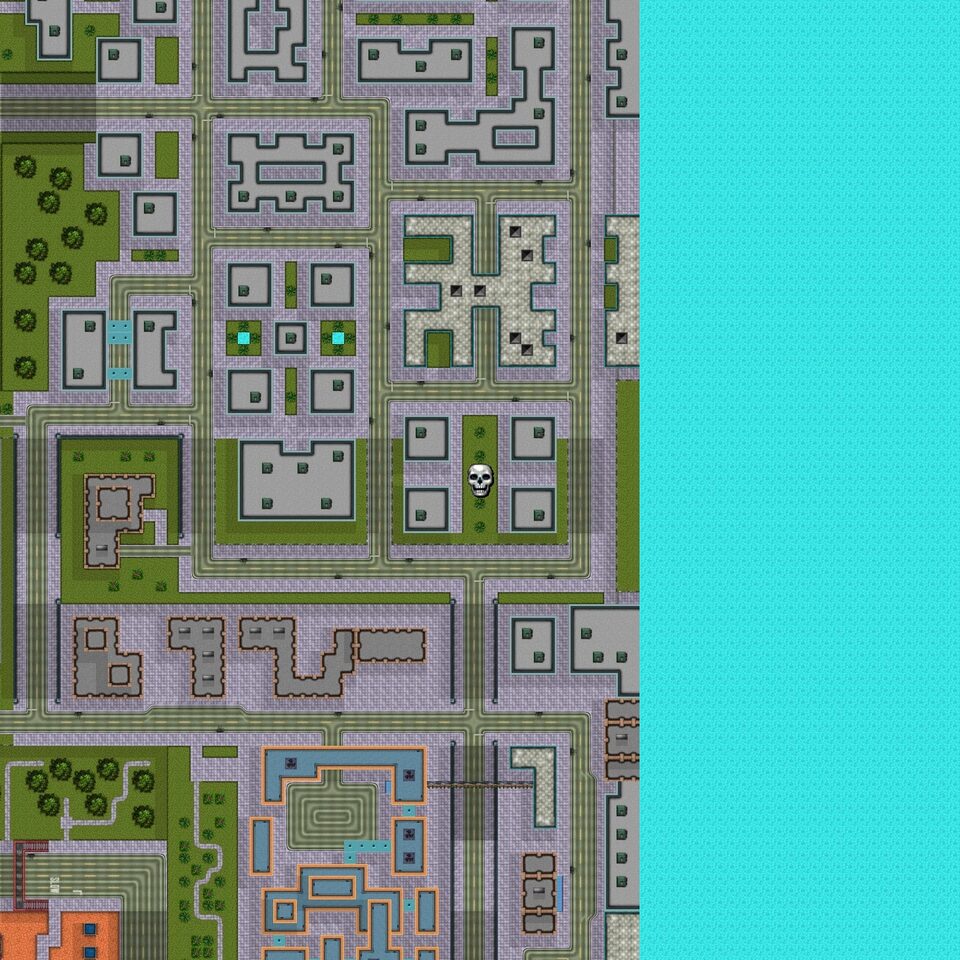
Kill Frenzy 10: Southeast Richman
In Southeast Richman, the frenzy spot is in a wooded park beside a district of red-roofed houses. Take the parked Tank to start it, then score $10,000 of damage within 2 minutes. Use the cannon on cars at junctions and crush what you cannot shoot.
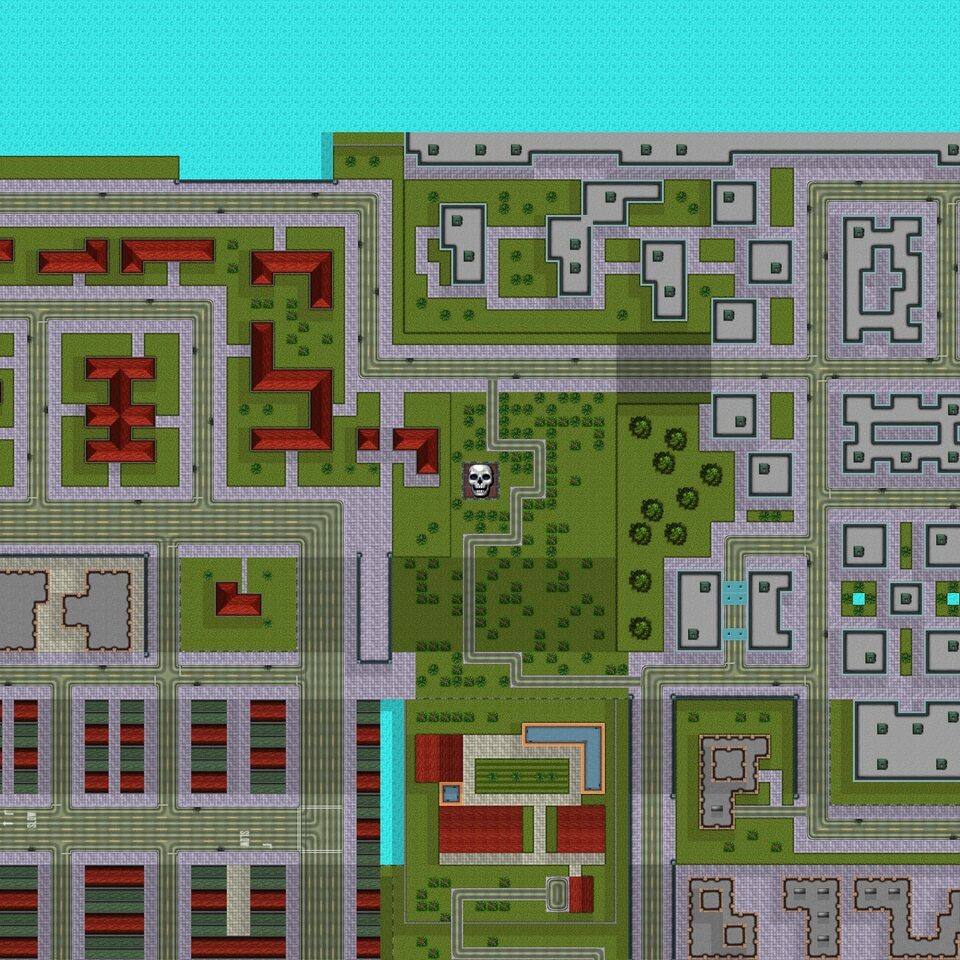
Kill Frenzy 11: North Soviet Hill
In North Soviet Hill, the frenzy spot is among red-roofed houses with green yards. Break the Flamethrower crate to start it, then score $15,000 of damage within 2 minutes. The range is short, so walk straight into crowds and cars to run up the total.
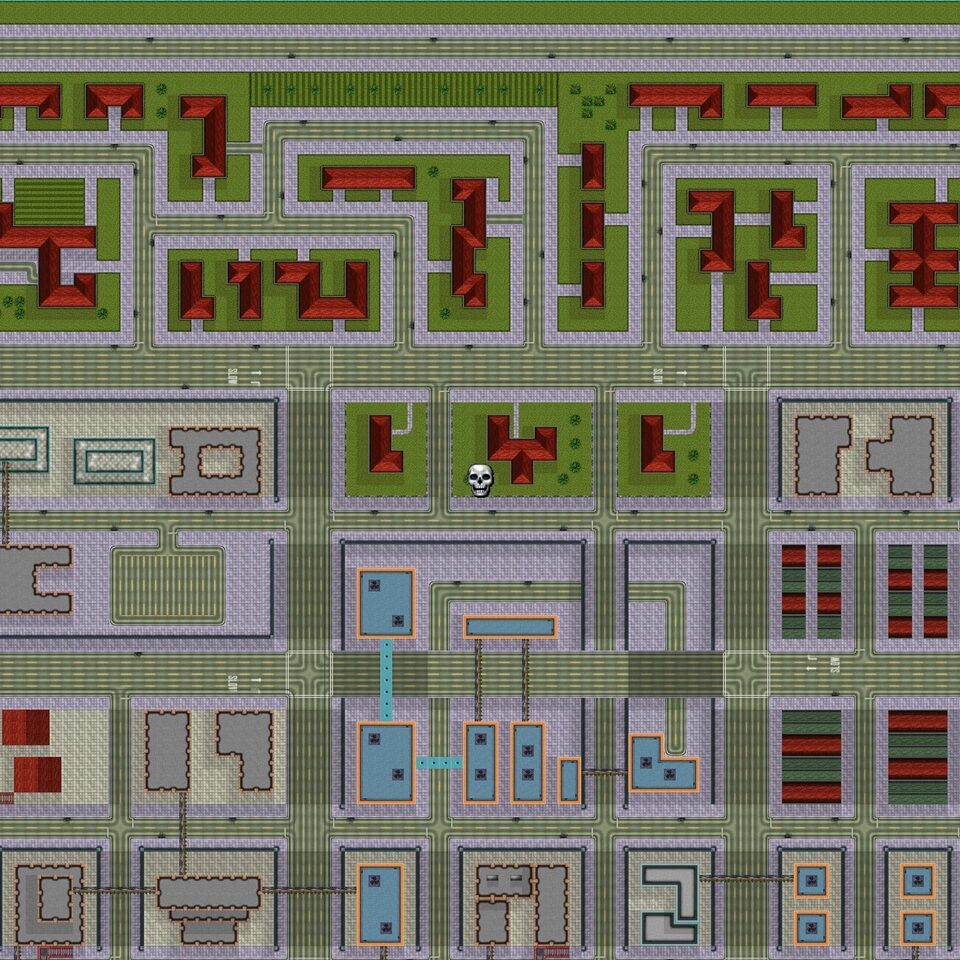
Kill Frenzy 12: Northwest Eagleside
In Northwest Eagleside, the frenzy spot is on the west coast, a few blocks from the water. Break the Rocket Launcher crate to start it, then score $15,000 of damage within 2 minutes. Keep your distance from the blast and aim at groups of cars at junctions.